The truth is…
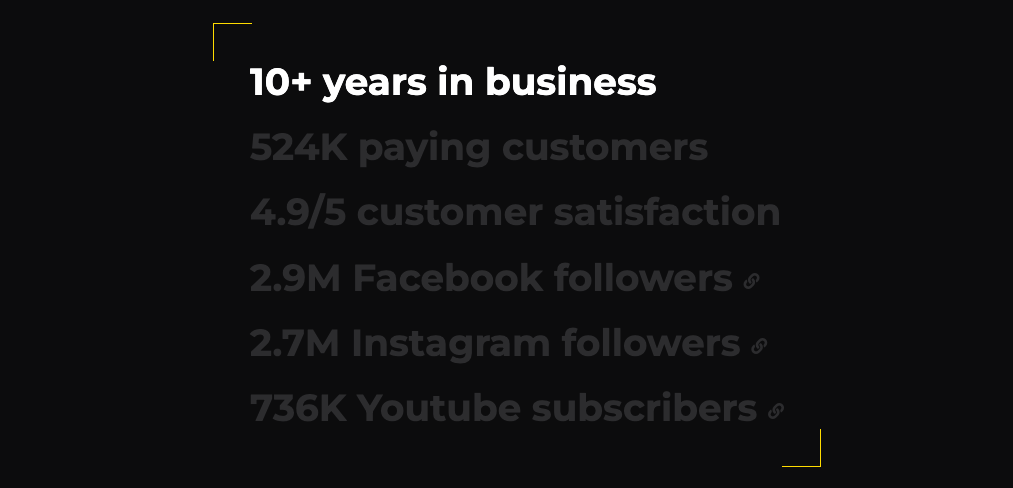
iPhone Photography School has been around for years now and has helped 1000s of students improve in taking photos with their iOS cameras.
And Emil Pakarklis is the man behind this digital learning platform that provides good value for money education.
In this Emil iPhone Photography School review, we’ll discuss:
- who is Emil Pakarklis
- if his courses are worth it
- is iPhone Photo Academy legit
- iPhone Photography School cost
- how he founded iPhone Photography School
(Plus several other things about this popular iPhoneographer who has a global reach in this niche.)
Without further ado, let’s get started.
But first, an important announcement… ↴
New Year 2026: BIGGEST Sale Ever!
I wanted to give you a heads up about the upcoming New Year sale.
iPhone Photography School (and their sister Photography Pro company) decided to go all in and make this the biggest sale of the year.
During this sale, they’re giving a MASSIVE 90% discount on all courses.
They also offer their exclusive ALL-ACCESS PASS with a 95% discount!
It gives people lifetime access to ALL

If you want to choose individual courses that fit your needs, then be sure to click the links below to get the best deal right now:
- iPhone Photo Academy
- iPhone Editing Academy
- iPhone Video Academy
- Video Editing Academy
- Instagram Academy
- Capture It All
- iPhone Landscape Mastery
- Urban iPhone Photography
- iPhone Food Photography
- Drone Mastery
- Digital Camera Mastery
- Photo Shortcuts
- Lightroom Editing Mastery
- All-Access Pass (NEW!!)
So, don’t miss the chance to grab the courses at their lowest price yet!
Now back to the review… ↴
Emil Pakarklis Review (Summary)

- Full Name: Emils Pakarklis
- Birthplace: Jurmala, Latvia
- Nationality: Latvian
- Emil Pakarklis Wife: Oksana Ribule
- Profession: Educator, iPhoneographer, blogger, YouTuber, entrepreneur
Emil Pakarklis is a self-made iPhone photographer.
His career is proof that all things are possible if you only know how to unlock your full potential and be resourceful enough (many have failed for not even trying!).
Not only is he a photographer, but Emil is also a blogger, YouTuber, and educator.
He’s also the founder of the biggest iPhoneography learning platform on the Internet, iPhone Photography School, which has a lot of best-selling digital courses.
Here’s the full list:
- iPhone Photo Academy
- iPhone Editing Academy
- iPhone Landscape Mastery
- Capture It All
- Drone Mastery
- Instagram Academy
- iPhone Video Academy
- Video Editing Academy
- iPhone Food Photography
- Urban iPhone Photography
If you want to make the most out of your iOS camera, then Emil Pakarklis’ iPhone Photography School is the right choice for you.
The instructors have spent years to master different types and aspects of iPhone photography and they share all the secrets with you.
So, are Emil Pakarlis courses worth it?
Definitely, YES.
Whether you’re a total newbie, an enthusiast, an expert, or even a pro, you will certainly pick up a thing or two from iPhone Photography School courses.
==> Start with iPhone Photo Academy (80% OFF discount)
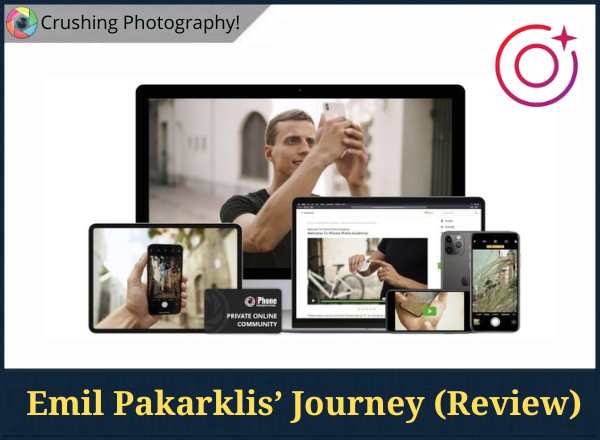
![]()
Emil Pakarklis iPhone Photography Journey
First things first…
Who is Emil Pakarklis?
If you have been interested in iPhone photography for a while now, you’ve probably already heard the name Emil Pakarklis. He is well known among iPhoneographers and professional creatives, alike.
The man is a popular YouTuber, content creator, blogger, and educator.
He hails from Latvia and his humble beginnings started there as well.
Emil is also the owner of Photography Pro and iPhone Photography School – a platform that has helped thousands of students achieve their magazine-worthy iPhone shots.
Emil Pakarklis bio in a nutshell:
Pakarklis always had a passion for photography even at a very young age.
However, he wasn’t able to pursue that dream seriously at that time due to various reasons, but mainly because DSLRs are very expensive and there were no decent compacts up to his standards.
But, when he got his iPhone 4s back then, everything started to change and he found his love for photography spark again.
Emil was shocked at how good the image quality was from the iOS camera and from then on, he just practiced and mastered the craft.
During those times when Pakarklis was still exploring and discovering the amazing things an iPhone can do, he couldn’t find comprehensive tutorials online on how to use the device to its full potential as a photography device.
So, he decided to learn it on his own and that took years of practice.
Right then and there, he knew he had to share this with others so he decided to establish the iPhone Photography School…
The rest is history.
iPhone Photography School Courses
After creating the platform, Emil went on to launch his first course – iPhone Photo Academy – that became a flagship digital product and the first step to everyone mastering iOS cameras.
This one was created with the mindset that every iPhone owner should be able to take advantage of the superb camera quality the device comes with.
(Especially the ones in the latest smartphone versions.)
We often hear one question: “Is iPhone Photo Academy legitimate?”
Yes, it is!
Here’s a mini iPhone Photo Academy review/summary plus a video overview:
-
iPhone Photo Academy
Whether you just got the latest iOS phone, or you have a well-working older model, you can enjoy shooting beautiful scenery using this device.
Emil will let you in on some of his techniques for capturing striking photos for your social media accounts.
The years he spent mastering these tricks are compressed into a few hours so you don’t have to wait too long to see the results.
You can check our full review here, or check the current discounts here.
Here’s a video review I created on the topic 3+ years ago and I still think it’s worth it for beginners and enthusiasts.
Apart from this course, there are other pretty amazing stuff inside the IPS platform. Let’s take a quick look at each one of them.
-
iPhone Editing Academy
Although iOS cameras already take good photos right off the device, there are times when you want to make the shots even better. And the best way to do that is through post-processing (editing).
Now, you no longer have to transfer files to the computer to do that.
Emil will share with you some easy-to-follow steps on how to edit your photos like a pro on the device itself.
You can check the full review here, or check the current discounts here.
-
iPhone Video Academy
Many of us are already aware of how good iOS cameras are when taking photos. But, did you know that it’s as good for videos as well?
In this digital training, Simone Ferretti takes you to a whole new level of iPhone videography. After completing the class, you’ll never take the same boring videos as before.
You can check our full review here, or check the current discounts here.
-
Video Editing Academy
This is another Simone Ferretti course that you take next after your iPhone Video Academy review.
Whether you’re a content creator, a small business owner, or just someone who wants to make polished personal videos, VEA teaches you everything you need to know about editing on your iPhone.
It’s perfect for anyone looking to turn simple footage into stunning, cinematic videos.
No in-depth review yet, but you can check the current discounts here!
-
Capture It All
This is a course by Clifford Pickett, a professional photographer and educator.
Here, he will teach you how to use your phone to capture anything!
He believes that your $1000 iPhone is the best device you can carry with you, and when you see the results, you’ll argue no more.
This will unlock some new techniques and photography hacks not commonly known by regular iOS users.
You can check the full review here, or check the current discounts here.
-
iPhone Landscape Mastery
Who says you can only take pretty landscape photos through a DSLR?
After finishing this lesson, you will be able to use your iPhone to take breathtaking landscape and nature photos.
Imagine being able to capture a picturesque scene without bringing bulky cameras and accessories. That’s almost a dream for professional photographers, in the realest sense.
You can check the full review here, or check the current discounts here.
-
Urban iPhone Photography
Landscapes and nature are not the only subjects for photography.
Even the city can be a good setting for a photo session. If you are living in an urban area, this class will help you see the beauty in your surroundings like never before.
After this lesson, you will be able to convey a message to your audience about how wonderful city life is (through pictures).
No in-depth review yet, but you can check the current discounts here!
-
iPhone Food Photography
Let’s admit it.
We live in an age where taking photos of food as soon as they’re served seems imperative.
Whether it’s for posting online, or sharing it with loved ones, we couldn’t help but take shots of our plate before touching the food.
If you’re fond of doing that, then this is good news for you. IPS created a course dedicated to food photography using your iOS device only.
You no longer need large and heavy cameras to take pretty photos of your dining experience today.
With your iPhone, you can take as many pictures as you want, without making other people around you feel uncomfortable.
You can check the full review here, or check the current discounts here.
-
Instagram Academy
Hannah Argyle (now Hannah Birtwhistle) is a well-known photographer and social media expert, known for her incredible talent in visual storytelling and her Instagram following of over half a million.
Her journey serves as an inspiration and her knack for capturing stunning photos and crafting engaging narratives has made her a go-to authority in the field.
That’s why IPS teamed up with her to create Instagram Academy.
As an instructor, Hannah shares her extensive expertise and real-world experience, offering valuable insights into building a successful Instagram presence.
So if you want to elevate your Instagram game, then this one is a great choice for you.
You can check the full review here, or check the current discounts here.
Who Is It Best For?
The iPhone Photography School by Emil Pakarklis is really for everyone, who’s interested in mastering their iOS cameras.
The courses are meant to unlock your smartphone’s full potential so that you no longer need to carry around bulky cameras whenever you want to shoot something casually – without all the grand preparation etc.
While it’s true that an iPhone cannot replace DSLRs for lots of reasons, it’s a powerful tool that will help you capture moments when they happen.
So, these courses are for you if you’re one of the many people who wish to improve their mobile photography skills.
Is iPhone Photography School Legitimate?
So…
- Is iPhone Photography School legit?
- Is iPhone Photography School worth it?
Yes, as a student who has access to all of the courses, I know for a fact that it Emil Pakarklis iPhone Photography School is legit.
I also think that it is worth it.
Emil has had a wonderful journey and has done an incredible job creating one of the biggest learning platforms on the Internet. It is the go-to place if you want to master your iOS camera.
Sure, every platform has its set of strengths and weaknesses, and that holds true for iPhone Photography School as well.
But despite that, I personally believe that every course you take from Emil’s platform will be worth your time and money (not biased or anything because I have access to the courses and they’re great stuff).
So, if you’re looking for a place to start your iPhone photography journey, IPS is one great platform you can consider.
One of the commonly asked questions is about Emil Pakarklis net worth. This information is unknown, but we do know that he has a highly successful business and is doing pretty well for himself.
Now, I’d like to hear from YOU:
- Your thoughts on this Emil Pakarklis review?
- Have you tried any of the iPhone Photography School courses?
- Do you have any iPhone photography school reviews complaints?
Share your thoughts in the comments section below!